Preparing Your Cabinets

Right, so before you get all artsy and start slapping on that stain, you need to prep your cabinets like a pro. This is all about making sure your stain goes on nice and smooth, and you get a finish that’s totally rad. Basically, it’s about getting rid of any dirt, grease, or old finish that might be hanging around, and making sure the wood is nice and even.
Cleaning Wood Cabinets
Cleaning your cabinets before staining is crucial. It removes any dirt, grease, or old finish that could prevent the stain from adhering properly. This ensures a smooth and even finish.
Here are some methods you can use to clean your cabinets:
- Using a Degreaser: This is the best option for removing grease and grime. You can use a commercial degreaser or make your own by mixing equal parts white vinegar and water. Apply the degreaser to a clean cloth and wipe down the cabinets, paying attention to areas that might have grease build-up. Make sure to rinse the cabinets thoroughly with water after cleaning.
- Using Soap and Water: If your cabinets are not too dirty, you can simply use soap and water to clean them. Use a mild dish soap and warm water. Apply the soapy water to a clean cloth and wipe down the cabinets. Rinse the cabinets thoroughly with water after cleaning.
- Using a TSP Solution: Trisodium phosphate (TSP) is a powerful cleaner that can remove stubborn dirt and grime. However, it’s important to wear gloves and eye protection when using TSP. Mix one cup of TSP with one gallon of warm water. Apply the solution to a clean cloth and wipe down the cabinets. Rinse the cabinets thoroughly with water after cleaning.
Sanding Wood Cabinets
Once your cabinets are clean and dry, you need to sand them to create a smooth surface for the stain to adhere to. This also helps to even out any imperfections in the wood.
- Sanding Techniques: You can use an electric sander or sand by hand. If sanding by hand, start with a coarse-grit sandpaper (80-120 grit) to remove any old finish or imperfections. Then, move to a medium-grit sandpaper (120-180 grit) to smooth out the surface. Finally, finish with a fine-grit sandpaper (220-240 grit) to create a smooth and even surface. If using an electric sander, follow the same grit progression.
- Types of Sandpaper: There are different types of sandpaper available, including:
- Sandpaper: This is the most common type of sandpaper. It’s made from abrasive material, like aluminum oxide, bonded to a paper backing. Sandpaper is available in a wide range of grits, from coarse to fine.
- Steel Wool: This is a good option for smoothing out rough spots and removing old finish. It’s also useful for creating a distressed look on wood.
Removing Dust and Debris
After sanding, it’s essential to remove all dust and debris from your cabinets. This prevents the dust from getting trapped in the stain and creating a cloudy finish. You can use a vacuum cleaner with a brush attachment or a tack cloth to remove the dust.
Choosing the Right Stain

Choosing the right stain is crucial for achieving the desired look for your cabinets. The type of stain you choose will affect the colour, finish, and durability of your project.
Types of Wood Stains
There are several types of wood stains available, each with its own characteristics and advantages:
- Oil-Based Stains: Oil-based stains are known for their deep penetration into the wood, resulting in rich colour and a natural finish. They are also durable and long-lasting, making them suitable for high-traffic areas. However, they take longer to dry and can be messy to work with.
- Water-Based Stains: Water-based stains are easier to clean up and dry faster than oil-based stains. They are also less likely to raise the grain of the wood. However, they may not penetrate as deeply as oil-based stains, resulting in a less vibrant colour.
- Gel Stains: Gel stains are thick and creamy, making them ideal for vertical surfaces as they are less likely to run. They offer good colour penetration and a smooth, even finish. However, they can be more expensive than other types of stains.
Factors to Consider When Choosing a Stain Colour
When selecting a stain colour, consider the following factors:
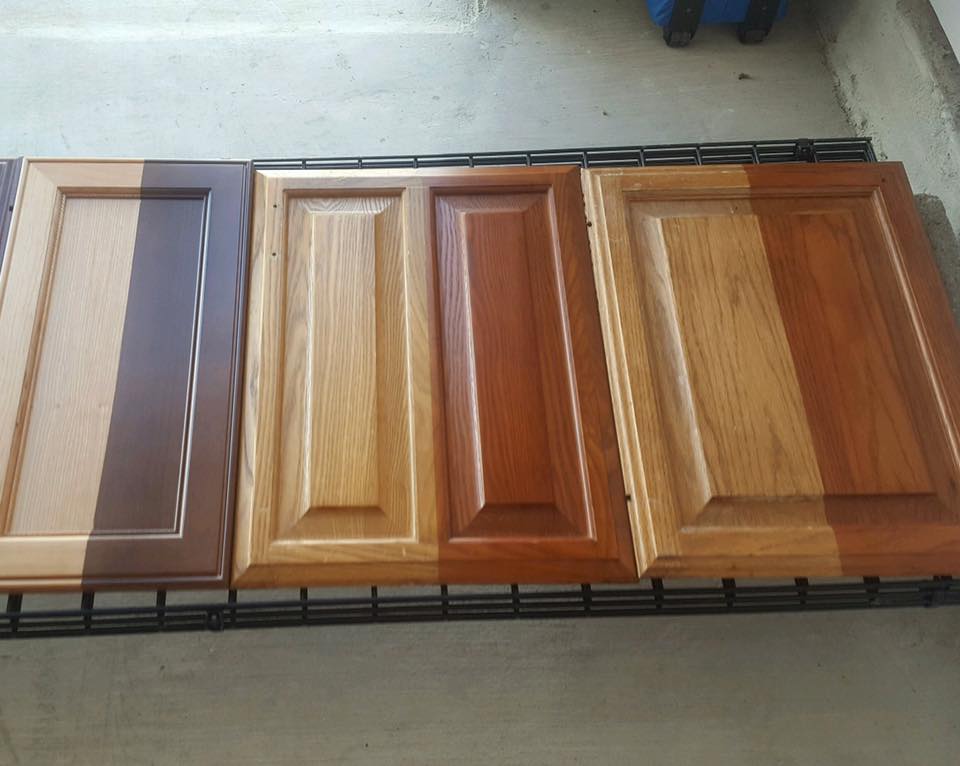
- Existing Wood Colour: The natural colour of the wood will affect the final colour of the stain. For example, a light wood will absorb the stain more readily, resulting in a darker colour than a dark wood.
- Desired Outcome: Consider the overall look you want to achieve. Do you want a natural, light finish, or a rich, dark colour?
- Personal Preference: Ultimately, the best stain colour is the one that you like best. Experiment with different colours and finishes to find the one that suits your style.
Testing the Stain
It is essential to test the stain on a hidden area of the cabinet before applying it to the entire surface. This will help you to see how the stain will look on your wood and ensure that you are happy with the colour and finish.
Applying the Stain: How To Stain Wood Cabinets

Right, so you’ve prepped your cabinets and picked out the perfect stain, it’s time to get your hands dirty! Applying the stain is where the magic happens, but it’s important to get it right to achieve that slick, professional finish.
Applying the Stain
You’ll need a few bits and bobs to get started:
- Your chosen wood stain
- A clean brush or cloth
- A rag for wiping excess stain
- Gloves (you don’t want stained hands, do you?)
- A drop cloth to protect your work area
First, lay down your drop cloth to keep your workspace clean. Then, grab your brush or cloth and dip it into the stain. You want to use a light hand, just enough stain to coat the surface evenly. Avoid over-applying the stain, as this can lead to drips and streaks.
Work with the grain of the wood for a smooth, natural finish.
If you’re using a brush, gently brush the stain onto the wood in the direction of the grain. If you’re using a cloth, rub the stain into the wood in a circular motion. Make sure you cover the entire surface of the cabinet. After you’ve applied the stain, wipe away any excess with a clean rag. This will help to prevent drips and streaks, and it will also give you a more even finish.
Applying Multiple Coats
If you want a deeper color or a richer finish, you can apply multiple coats of stain. Let the first coat dry completely before applying the second coat. If you’re using a dark stain, you may need to apply several coats to achieve the desired color.
Achieving a Smooth and Consistent Finish, How to stain wood cabinets
Here are a few tips to help you achieve a smooth and consistent stain finish:
- Work in small sections, about 2-3 feet at a time.
- Keep your brush or cloth clean and free of excess stain.
- Don’t over-apply the stain, just enough to coat the surface evenly.
- Wipe away any excess stain immediately with a clean rag.
- Let the stain dry completely between coats.
How to stain wood cabinets – Yo, staining wood cabinets is a total game-changer, it’s like giving your space a whole new vibe. If you’re going for a bathroom makeover, check out this bathroom vanity with mirror and cabinet , it’s fire! But, remember, before you start staining, make sure your cabinets are prepped and ready to go, or you’ll be kicking yourself later.
Yo, staining wood cabinets is like giving them a whole new look, right? It’s all about the prep, the stain, and the finish. If you’re thinking about a bathroom refresh, maybe a freestanding bathroom cabinet grey would be a dope addition.
Just remember to pick a stain that’s gonna hold up to the humidity in the bathroom, cuz you don’t want your cabinet lookin’ all funky. So, get those gloves on and let’s get this stainin’ party started!
